Turmeric & ginger panna cotta

Happy 2017 guys! This is a super late post but I have been under such a food coma since Christmas that I had to time myself out to get life back on track! Christmas and New Years this time was really good on a gastronomical front. I finally got to try out a handful of highly raved about restaurants in Mumbai to test for myself if it was as good as everyone around me claimed (it was). I was seriously mind blown with the flavour combinations and fusions that the city offered.

In my short visit, I indulged in puff pastry loaded with mushrooms and cheese, sinfully guilted on possibly the best cheesecakes ever, smoked my ears out with charred cheese stuffed chili’s, was pleasantly surprised with the Indian take on a classic sushi, learnt that lemongrass makes for a really refreshing mousse and relished on a ton of desserts with unbelievable flavour twists.

And then of course there was a lot of home cooking and experimenting as well. So in a nutshell, I was overdosed on food when I came back to SG!

After one weeks rest, here I am, back to cooking and blogging. For the longest of time, I have wanted to use turmeric and ginger in a dessert format. Turmeric milk is a very common home remedy in India for cold and flu. Back home, we add crushed pepper, honey and raisins as well to help soothe an irate throat. The combination of these ingredients makes for a really yummy milk and is very therapeutic. It needs to be consumed piping hot when you are ill, but I really wanted to know how it would be in a chilled, custard-like form. So using similar same measurements used for the milk, I made panna cotta.

Now, I was expecting the panna cotta to be good, but trust you me, it is so much better than good! It’s cool, refreshing and plain yummy. If you have ever had turmeric milk (aka haldi ka doodh) during your childhood days this dessert is bound to make you nostalgic.
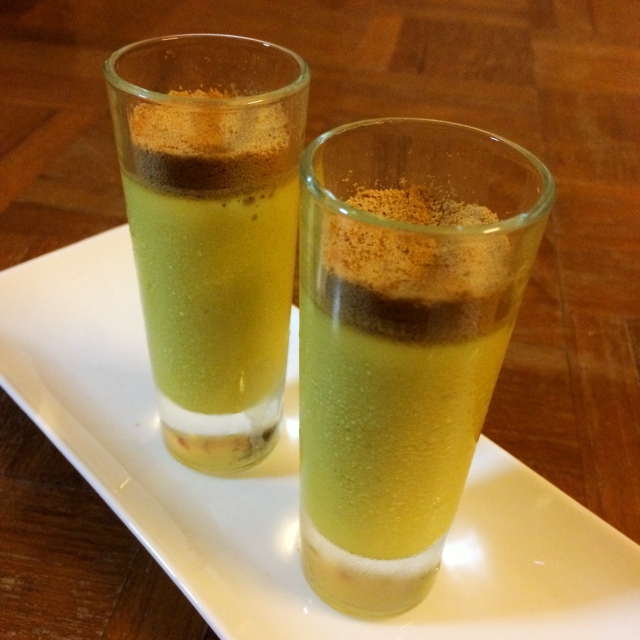
img_1707

Ingredients:

  • Heavy cream: 300 ml
  • Turmeric powder: 1 tsp (heaped)
  • Ginger: 1 tbsp, finely grated
  • Honey: 1/4 cup (or less, depending on your sweetness preference)
  • Black pepper: 1/2 tsp, freshly crushed
  • Gelatin: 2 tsp
  • Cold water: 2 tbsp

Method:

  • Mix all ingredients except gelatin and cold water in a pot and bring it to a steady simmer
  • Keep stirring occasionally and allow the cream to simmer for 5 minutes
  • Switch off the flame and allow the flavours to steep into the cream for another 5-7 minutes
  • In the meanwhile, bloom the gelatin in cold water
  • Add gelatin to the cream mixture and mix well so that it dissolves. The cream needs to be lukewarm when adding the gelatin – if it has become cold then switch the flame back on and heat till the mixture just starts simmering.
  • Sieve the cream through a fine mesh and pour into individual ramekins / shot glasses
  • Refrigerate overnight and serve once set
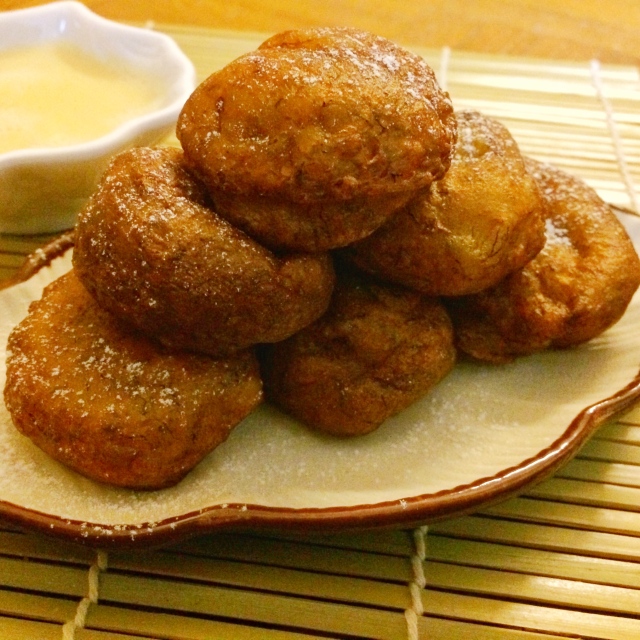
Kuih kodok (Malaysian fried banana fritters)

Some time ago, my colleague had gotten homemade kuih kodok (i.e. Malaysian fried banana fritters) to work. They tasted so good; light, moist and rich in banana flavour. I loved the fritters so much that I had mentally tucked this dish aside to make at some point.

Today was a cold and rainy day; adding to my misery only because I was feeling under the weather. Regardless, here is the thing: when it rains, I have to have something fried, fresh and piping hot straight out of the frying pan. And this has to be accompanied with ginger tea.

Back home, I always bug my mum to make onion fritters (pakoras) with mint and tamarind chutneys while our housekeeper brews a fresh pot of strong ginger tea. We then munch away on the pakoras and idly chill while the rain pitter-patters.

Home away from home here, I can never bring myself to make onion fritters, because it feels like something that is special only with my mum. So instead I make other fried goodies, like today, where I decided to make the Kuih kodok.

These fritters puff up the minute it hits the oil and turn a beautiful hue of golden brown. When eaten hot, they are ever so soft, with a thin wafery crisp skin outside and pillowy soft inside, that is laden with the banana mix. So good.

I complemented the fritters with a caramel coconut sauce because I wanted something extra sweet. Coconut pairs with banana really well, but if you don’t like coconut, you can eat the fritters on its own. Or, if you don’t have a very sweet tooth, you can just serve a dollop of coconut cream with the fritters to cut the sweetness.

Any which way, these banana fritters are killer good and not too complicated to make, so you should definitely try your hand at it!

img_0623

Ingredients:

Kuih kodok:

  • Ripe bananas: 2, medium sized, roughly mashed
  • Plain flour: 1 cup
  • Sugar: 1 tbsp or as need, based on the sweetness of bananas
  • Salt: A pinch
  • Baking soda: 2 tsp
  • Water: 1/2 cup
  • Oil: To fry fritters

Caramel coconut dipping sauce:

  • Sugar: 1/4 cup
  • Water: 1 tbsp
  • Coconut cream: 1 cup

Method:

Kuih kodok:

  • Mix all dry ingredients in a bowl and add water
  • Mix well to combine and add mashed bananas
  • Stir gently to combine. The batter should be thick with a dropping consistency
  • Cover the bowl and allow the batter to rest for an hour
  • Heat oil and drop spoonfuls of batter into the frying pan
  • Remove fritters once they turn golden brown and puff up onto an absorbing paper
  • Serve immediately

Caramel coconut dipping sauce:

  • Heat sugar and water in a pan till it caramelises and turns golden brown
  • Meanwhile, heat the coconut cream separately under low flame till it reaches its boiling point
  • Once the sugar caramelises, pour the coconut cream into it and stir continuously to ensure that the sauce is smooth without any lumps
  • Cool and serve with the fritters (or refrigerate in an airtight container)


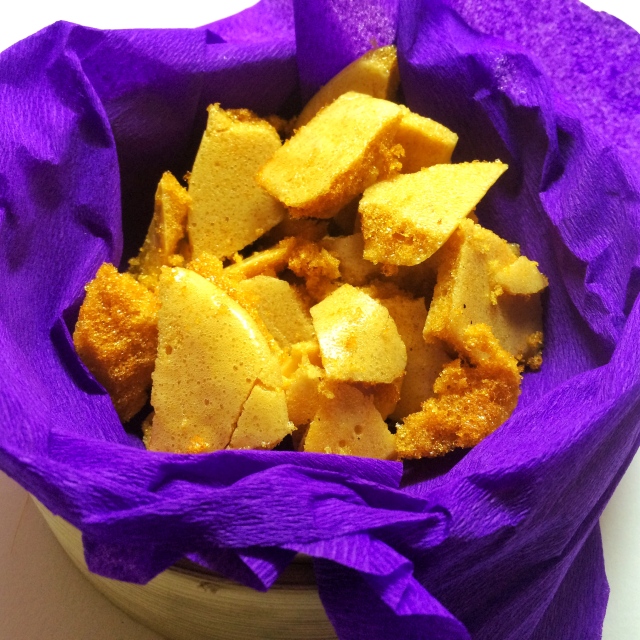
Homemade honeycomb

When I was a kid there were a select few chocolate treats that I would indulge in: Cadbury gems (specifically the pink and orange candy coated ones – my dad would sieve these ones out just for me), Cadbury fruit and nut (because that was/is my mums favourite and I automatically liked whatever she did) and Cadbury Crunch, because the combination of crunchy golden honeycomb with chocolate was way too irresistible.

Truth be told, I still love Cadbury Crunch and usually stock up on these for “emergency” needs. But you know how your stocked up goodies is never at our disposal when you really need it? This is exactly what happened over the weekend. I was super craving it but alas there were none for me to feast on!

Stubborn as I am, I thought okay lets see if it can be home made. And to my absolute surprise I learnt that it is really easy to make! The down side was that all recipes called for a lot of golden syrup – which is a) really not healthy and b) not an ingredient I keep.

So I figured, why not replace golden syrup with honey? It is after all, “honey”comb.

And as they say the rest is history. I came up with my own concoction and minutes later I was proudly staring at delicious, light, crunchy honeycomb made by moi.

And now, I am so excited to share it on my blog so that you can have a go at making it too !

img_0531

Ingredients:

  • Pure honey: 1/4 cup
  • Sugar: 3/4 cup
  • Baking soda: 1/2 tbsp

Method:

  • Keep a silpat mat or a tray lined with parchment paper ready
  • Sift baking soda into a small bowl and keep aside
  • In a deep pot, add sugar and honey, and give it a good mix with a spatula to ensure homogeneity
  • Heat the sugar-honey mixture under medium flame, stirring occasisonally
  • Switch off the flame once the sugar completely dissolves and the mixture starts caramelising (this is indicated by the change in color to a darker brown)
  • Quickly dump the baking soda and stir continuously, till the powder dissolves well. Be careful at this step as the mixture will bubble up (which is why you need a deep pot)
  • Immediately pour the mixture onto a silpat mat or a tray lined with parchment paper and allow it to cool (or stick it in the fridge to cool, if your surrounding is too hot/humid)
  • Once cooled, break the honeycomb into bite-sized pieces and enjoy!
  • Store the leftovers in an airtight container

Kaju-pista rolls

Another popular sweet in India, kaju-pista rolls (cashew-pistachio fudge rolls) are found in every sweet shop and widely consumed during festivals like Ganesh Chaturthi and Diwali.

IMG_8710.JPG

Ingredients:

  • Cashews: 1½ cups
  • Pistachios: 1½ cups
  • Condensed milk: 1 cup
  • Ghee: 2 tbsp
  • Powdered sugar: 3/4 cup
  • Rose water: 1/2 tsp
  • Cardamom powder: 1/4 tsp

Method:

Prepare cashew dough:

  • Grind cashews in a dry mixer for 1 minute at a stretch, into fine powder (if you stop in between, the cashews will secrete its oil, making the overall consistency sticky)
  • Melt ghee in a pan over medium flame
  • Add condensed milk and stir continuously for about 30 seconds
  • Add cashew nut powder and give it a good mix
  • Cook the mixture over low heat, and keep stirring until the mixture starts leaving the sides of the pan and begins to form into a soft dough (this should talk about 5-7 minutes)
  • Once mixture comes together, switch off the flame and keep aside for the mixture to cool
  • Once the mixture is cooled enough to be handled, knead it well to make smooth dough, with greased hands
  • Cover the dough and keep aside

Prepare pistachio dough:

  • Grind the pistachios in a mixer to a fine powder
  • Transfer the powder into a large bowl and add powdered sugar
  • Add rose water and mix well, forming a dough (add a few drops of water to help with the binding, if needed)

Make the rolls:

  • Place parchment paper on the counter
  • Divide cashew and pistachio doughs into two and four portions respectively
  • Roll the cashew dough into thin, circular layer
  • Cut the layer in half
  • Shape one of the pistachio portions into a log and place it over the half cashew layer
  • Roll the cashew sheet over the pistachio log and pinch the sides and edges, sealing it well
  • Cut the roll into 2 inch pieces
  • Repeat process with rest of the dough
  • Decorate the rolls with saffron or silver warq
  • You can store the rolls in the refrigerator for up to a week

Ukadiche modak

I love the second half of the year because that’s when all Indian festivals start in full swing. Of the gazillion festivities that we celebrate, Ganesh Chaturthi is probably my favourite most (the second being Diwali).

Ganesh Chaturthi is an Hindu festival that is celebrated in honour of the beloved elephant-headed god, Ganesha.

This is a very auspicious day for Indians, who celebrate the festival in full swing and pray to the God so that every new activity started is successfully completed sans obstacles. Ganesh Chaturthi generally lasts ten days.

Processed with Snapseed.

My decorations for this years Ganesh Chaturthi 🙂

Now, ten days is a long time to enjoy the positivity from the atmosphere, and true to any other festivities that we have, Ganesh Chaturthi is also celebrated with lots of sweets and snacks that God likes.

The most popular sweet that is commonly made across all households and sweet shops are ukdiche modaks: a sweet dumpling, filled with fresh coconut and jaggery, with an outer covering of rice flour. The dumplings are then steamed and eaten hot with ghee (clarified butter). 

I tried making modaks for the first time last year; unfortunately at that time, the filling turned out too dry and the outer shell a tad too thick for my liking. This year, having learnt from my previous experience, I accordingly readjusted the measurements for the filling and cover, and I am happy to say, they turned out delicious, and got sold out like hot cakes!

So try it out when you have time to spare: they are no doubt, a God’s gift 🙂

Processed with Snapseed.

[Partially adapted from: Theveggiefix]

Ideally makes 6 – you can make more or less, depending on the size of your modaks

Ingredients:

Outer shell:

  • Rice flour: 1 cup
  • Water: 1/2 cup
  • Ghee (clarified butter): 1 tsp
  • Sugar: 1/2 tsp
  • Salt: A pinch

Filling:

  • Jaggery: 1/4 cup, grated
  • Fresh coconut: 1/2 cup, grated
  • Ghee (clarified butter): 1 tsp
  • Mixed nuts (almonds, pistachio, cashew): 1 tbsp, powdered
  • Cardamom: 1/4 tsp, powdered

Method:

Outer shell:

  • Heat water in a pan to a rolling boil.
  • Add ghee, sugar and salt, mix till dissolved and turn off the heat.
  • Pour in all the rice flour and mix continuously till the dough comes together
  • Cover the pan and allow the dough to rest for 10 minutes (this will retain extra moisture and make your dough soft)

Filling:

  • Melt jaggery and ghee in a non-stick pan
  • Add coconut, mix with jaggery and cook the mixture till the moisture evaporates
  • Lastly, add in the powdered nuts and cardamom and mix well
  • Allow the filling mixture to cool and divide it into six parts

Assembly:

  • With greased hands, knead the dough till it is smooth and then equally divide the dough mixture into six parts
  • Flatten each portion into a thin disc (the thinner, the better) and place a portion of the filling in the center
  • Cover and shape like a modak (alternatively, you can buy a modak mould for the shape to come out more defined)
  • Slather the modak skins with ghee and steam them for 10 minutes (or till they are translucent and firm in appearance)
  • Serve immediately (with more ghee, if you like)

Lemon thyme shortbread

I’d been wanting to try making something sweet using lemon-thyme combination ever since I saw contestants use it during last seasons Masterchef AU.

I’m generally hesitant when it comes to using herbs in desserts; my brain cells make a direct association of herbs with soups, broths and pastas (i.e. anything savoury). A quick search online showed that it is in fact quite a common combination in sweets; nothing to be weary of.

I had a ton of plain flour stocked up, courtesy of my bread-making spree, so I thought of making shortbread cookies using lemon and thyme as the key flavourings.

It is hard to explain the taste; but they are crumbly and tender, with every bite full of delicate herbal and aromatic lemon flavours. Whats more, the sweetness is not at all overpowering, making this a perfect treat for high tea gatherings.

IMG_6774.JPG

[Recipe credit: Oleander and Palm]

Ingredients:

Unsalted butter: 1 cup, slightly softened
Castor sugar: 2/3 cup
Plain flour: 1 3/4 cup
Fresh thyme: 2 tsp, chopped
Lemon zest: 1 lemon
Pure vanilla essence: 1 tsp
Thyme sprigs: Small sprigs, for garnishing the tops of each cookie

Method:

  • Cream the butter and sugar with an electric mixer
  • Add the vanilla, lemon zest and thyme
  • Sift the flour and mix until the dough comes together
  • Wrap the dough in saran wrap and refrigerate 30 mins
  • Pre-heat the oven to 350F
  • Roll out the dough to a little less then 1/4 inches on a well floured surface; this is a very soft dough, that’s what makes them so tender when they are done
  • Keep the dough cold and work with flour on your hands and on the surface
  • Cut out desired shapes and top with a sprig of thyme
  • Place cut dough on parchment lined baking sheets
  • Chill the cut dough for at least 20 minutes before baking (this helps the cookies keep their shape and not spread on the cookie sheet)
  • Bake the cookies for about 12 minutes or until the edges are just starting to brown
  • Remove cookies and cool completely on wire racks if you want chewy cookies. Alternatively keep them on the baking tray and allow the heat from the tray to further bake the cookie – this will yield harder, crunchier cookies

Vegan meringues

The recent discovery of aquafaba has taken the world by storm. For those who are hearing it for the first time, it is chickpea brine that acts as the perfect egg white replacement.

And trust me, when I say perfect, I mean it literally has very very similar properties that an egg white would have. This is huge, because it opens gates for making dishes that just wont work without egg whites.

Naturally, I had to try out the magic myself. I decided to try making meringues because that would need me to whip the brine solution – I really wanted to see if it will transition from foamy – soft – stiff peaks.

Hallelujah it did! And then it baked so well, the end result was airy, crispy goodness that melted in your mouth.

I made my colleagues try it to check if they can detect the difference. They didn’t. Experiment successful. Aquafaba, you are my new found love for life ❤

IMG_6442.JPG

[Adapted from: Jasmine Lukuku, The blenderist]

Ingredients

  • Aquafaba: 1 cup, cold, drained from a can of chickpeas
  • Icing sugar: 2 cups
  • Corn flour: 2 tbsp
  • Vinegar: 1.5 tsp
  • Pure vanilla essence: 1 tsp

Method

  • Preheat the oven to 350F
  • Whip the aquafaba on high speed until it forms stiff peaks
  • Reduce the speed to medium and slowly add the powdered sugar
  • Once all the sugar is added, increase the speed to high again until you get an even, fluffy mix. Make sure that you don’t over do it!
  • Reduce the speed to low and add the rest of the  ingredients
  • Using a piping bag, pipe out small portions of the mixture on a tray lined with parchment paper or silpat mat
  • The meringues might spread a little in the oven, so ensure there is some distance between each meringue
  • Place the tray in the oven and immediately reduce the temperature to 300F
  • Bake for 90 minutes and then turn off the oven. Monitor the status of the meringues after 30-40 minutes, as every oven temperature setting differs
  • Remove tray from the oven and allow meringues to cool completely
  • Once cooled, store meringues in an airtight box, and keep it in a cool place
  • The meringues can be eaten as it is for a sugary treat or be used as decorations in various desserts
  • Happy baking!

Lychee-coconut phirni in alphonso mango

I had way too many seasonal mangoes left over that I was determined to use up before it seriously rotted beyond repair.

Some time back a friend of mine had instagram’ed a photo of sliced mangoes stuffed with ice cream, which her mum had made. It looked so delicious and unique that I had mentally bookmarked this idea for future exploration.

This weekend my grocer was selling fresh lychees. Lychees are one of the few fruits that I really enjoy eating, so I happily bought a box. On my way home it dawned me that with mango and lychee both available, I could finally come up with a good recipe which would allow me to retrieve the bookmarked idea.

I wanted to keep it as simple as possible, execultionally, since I did not want the filling to overshadow the beauty that lies in alphonso mangoes.

This is what prompted me to consider making a lychee phirni (rice custard) as the filling. It is simple to make, flavorful and sets well when kept aside.

When I went home, I saw leftover coconut cream in the fridge, so that got added into my phirni as well.

After making it came the tough part: Taste test. I made my flatmate try the first bite, and she loved it! She said that the flavours paired incredibly. Sweet!

This dish has been trialled on my flatmates and my colleagues – and it was unanimously enjoyed by all.

I must caution you, prepping the mango is a tad tedious; but I promise the end results are totally worth it !

IMG_6360

Ingredients:

  • Alphonso mango: 1
  • Fresh lychees: 15-18, peeled and deseeded
  • Coconut cream: 1/4 cup
  • Basmati rice: 3 tbsp, soaked and ground
  • Milk: 2 cups
  • Sugar: 5-6 tbsp (add as per preference as lychees are also sweet)
  • Cardamom powder: 1/4 tsp

Method:

Preparing the mango:

  • Cut the wedge on top of the mango, and using a slim knife, slowly carve out the seed and pull it out. The inner fruit flesh has to be as intact as possible
  • Using a spatula (or the back of a spoon), smoothen the inner walls of the now seedless mango
  • Place it in a cup (standing position), cover with saran wrap and keep in freezer to harden

Phirni:

  • Blitz the lychees and strain
  • Heat milk in a pan and add lychee juice and stir to mix well
  • Add the coconut cream after a minute
  • Allow the liquid to start simmering and then add the ground rice
  • Mix continuously, ensuring that the rice is evenly dispersed. Ensure that the flame is on low, since after adding the rice, the solution will thicken very quickly
  • Add sugar and cardamom powder and mix well
  • Add little milk if the mixture is too thick
  • Taste and adjust flavours as required
  • Turn off the heat once the phirni is considerably thickened (it needs to resemble a thick paste texture)

To serve:

  • Once the phirni reaches room temperature, transfer it into a piping bag and fill the mango to the brim
  • Cover the mango with a saran wrap again (ensure that the tip of the mango does not touch the wrap) and keep it in the freezer to set (about 15-30 minutes)
  • Remove the mango before serving
  • Slice the mango into thick, uniform slices and gently peel the outer skin
  • Ensure that you work quickly, since the heat will cause the phirni to melt very quickly
  • Serve with fresh lychees
  • Enjoy !

Mango barfi (fudge)

When mangoes are in season, you have no reason to not use it as a hero ingredient of lip smacking desserts!

I got a dozen alphonso mangoes from my grocer over the weekend, and they were perfectly sweet and fleshy. After devouring half a dozen and satisfying my craving, I was able to think how best to utilise the remaining mangoes.

I had recently read a recipe from last seasons Masterchef India winner, Nikita Gandhi that had been playing in my mind ever since. So with some of the juiciest mangoes in hand, I set about making mango barfi – an Indian dessert which is basically mango and milk solid fudge. They were not only easy to make, but just as incredible in taste.

Bookmark this recipe if you wont be trying it immediately, because it is a keeper!

IMG_6217

[Recipe credit: Nikita Gandhi, Masterchef India Season 4 winner]

Ingredients:

  • Alphonso mango pulp (fresh): 1/2 cup 
  • Milk solids (mawa): 1 cup, crumbled 
  • Sugar: 1/8 cup (adjust according to sweetness of mangoes and personal preference)
  • Cardamom: 4-5 seeds
  • Saffron: 4-5 strands 
  • Ghee (clarified butter): 1.5 tsp
  • Almonds: 4-5, slivered

Method:

  • Blitz sugar, cardamom and saffron strands. Sieve and keep aside
  • Heat 1/2 tsp ghee in a pan and add in the mango pulp. Stir continuously
  • Cook till the pulp slightly reduces
  • Add sugar, stir well and allow to cook till mixture further reduces
  • Add in crumbled mawa and cook till the ghee separates and mixture is very thick
  • Switch off the flame and add flavoured sugar and remaining 1 tsp ghee
  • Mix well – resultant mixture should be glossy
  • Pour mixture into into a greased aluminium/glass tray and flatten the top for uniformity
  • Sprinkle slivered almonds on top and press gently
  • Allow the mixture to set at room temperature
  • Once set, cut into squares and serve. It can also be stored in an airtight container

Serving suggestions: Serve with a bowl of berries (such as raspberries) to balance out the sweetness


Atayef asafiri – Stuffed Arabic pancakes

A couple of months back, I had read a post about Ramadan and iftar snacks on a friends blog. Of the various items listed, “atayef asafiri” caught my eye in particular.

A quick research on it showed that atayef asafiri / mini atayef are spongy and velvety Arabic pancakes, stuffed with fillings of your choice (usually cheese and/or nuts), drizzled with rosewater syrup. What I instantly loved about atayef asafiri was the versatility it allowed in your choice of fillings and syrups. All the more, the pictures that accompanied various sites looked so sinfully tempting. I had to try it out for myself over the weekend.

Images I saw promised of a heady combination of soaked pancakes followed by richness from the nuts and cheese – trust me, the end result did not disappoint in the least. What made it even more awesome was the appropriate bite-sized proportions: perfect for binge-snacking in the evenings.

Next time round, I really want to try out the fried version (regular atayef)

For now, here goes the fail-proof recipe for atayef asafiri. As always, a few small tweaks in my version of the recipe: the pancakes were stuffed with strawberries and cream, and the syrup was a honey lime dressing, since the batter already had rose water in it.

With the whole new trend of #brinner going on, why not give this a shot in place of the good old buttermilk pancakes that we all love waking up to?

IMG_4757

[Recipe credit: Sawsan, from Chef in disguise]

Ingredients:

Atayef

  • Plain flour: 1 cup
  • Semolina: 1/4 cup
  • Dry active yeast: 1/4 tsp
  • Baking powder: 1/2 tsp
  • Vegetable oil: 1 tbsp
  • Sugar: 1 tbsp
  • Rose water / Orange blossom water: 1 tbsp
  • Warm water: 1.5 – 2 cups

Strawberry cream cheese

  • Strawberries: 1 cup, chopped
  • Cream cheese: 1/2 block, roughly chopped, softened, brought to room temperature
  • Milk: Whole fat, 1/4 cup
  • Sugar: 4 tsp
  • Vanilla essence: 1/4 tsp

Honey Lime syrup

  • Honey: 1/4 cup
  • Lime zest: 1/4 tsp
  • Lime juice: 2 tsp

Method:

Atayef

  • Mix all dry ingredients in a bowl
  • Add water, oil and rose / orange blossom water and whisk thoroughly until the mixture becomes homogeneous
  • Cover the bowl with saran wrap and keep aside to rest for 10 minutes
  • Heat a non-stick pan, and pour a ladleful of batter onto it under medium-low flame (general rule of thumb: 1 tbsp for small sized, 2 tbsp for medium and 1/4 cup for large sized atayef)
  • The atayef should start to bubble around the edges and spread to cover the rest of the surface
  • If this does not happen, the batter is too thick – add some more water (1/4 cup additions) and whisk again to homogeneity
  • The atayef is cooked with the surface is no longer shiny
  • Remove the atayef and keep it in a deep dish, covered with saran wrap. The covering ensures that atayef stays moist and does not dry/crack at a later stage
  • Repeat process with the rest of the batter (it should yield roughly 15 medium sized portions)

Strawberry cream cheese

  • Place all ingredients except the strawberries in a bowl and whisk till it is smooth and homogenous
  • Taste and modify ingredients as per your preference
  • Add chopped strawberries and gently fold it into the cream cheese mixture
  • Cover bowl with saran wrap and refrigerate till needed

Honey lime syrup

  • Add all ingredients in a bowl and whisk well with the back of a spoon till well-blended

To assemble

  • Fold the atayef into a half circle and seal it only half way (as shown in the image above) by pressing it down with your thumb and index fingers
  • Place 1-2 tsp of filling in the opening
  • Repeat with remaining atayef’s
  • Arrange on plate and lightly drizzle honey lime syrup over it
  • Serve immediately, along with the syrup by the side